You like a fancy suit, I like a fancy video stream
Like many, the COVID pandemic has me working from home. The times I was physically at the office or at a customer in the last couple of months can be counted on 1 or 2 hands. Of course this comes with some downsides: I miss really connecting with people in person from time to time, and reading body language can be harder over camera. I’ve also seen how it can be hard for those who are single, don’t have a dedicated working space at home and/or have small kids running around. It’s not a silver bullet. However, I’m in the lucky position to have a dedicated office space, and working remotely has grown on me. I appreciate the freedom: I have my own desk, and can spend my time however I want as long as it leads to output. I’m much more healthy as I eat more responsibly and the time gained from no commutes, airplanes or hotels I can spend on taking a hike to unwind.
Home office improvements
Since I’m convinced that by now the pandemic has fundamentally changed our ways that much we will never completely go back to ’normal’ again, I have been investing in my home office setup: I moved to a better (larger) room in my house. It allows me to not be claustrophobic, get some natural light in, and has space for sitting away from my desk for a while when reading/consuming content. I contemplated getting a new airco for this new room, but thought it would be ok as it was facing North and was immediately punished by the worst heatwave the Netherlands have seen in recorded history, so another airco is on the way.
Thoughts on video quality
Before COVID I worked remotely as well about 2-3 days a week. But the mode of operation was much different: I would use these days as much as possible to really double down and get thing done, and would use the other days for ‘people stuff’. So I would rarely have video calls when working remotely. But working from home 5 days a week is not an extrapolated version of working from home 2-3 days a week. It is wildly different: everything now happens remotely. My old Logitech C270 which I bought in 2011 for €20 was good enough for the occassional call that had to happen, but it started to bother me I looked like I was filmed through a potato and my voice was recorded with a carrot on every single call. To give you an idea, this is a screenshot in good light conditions:
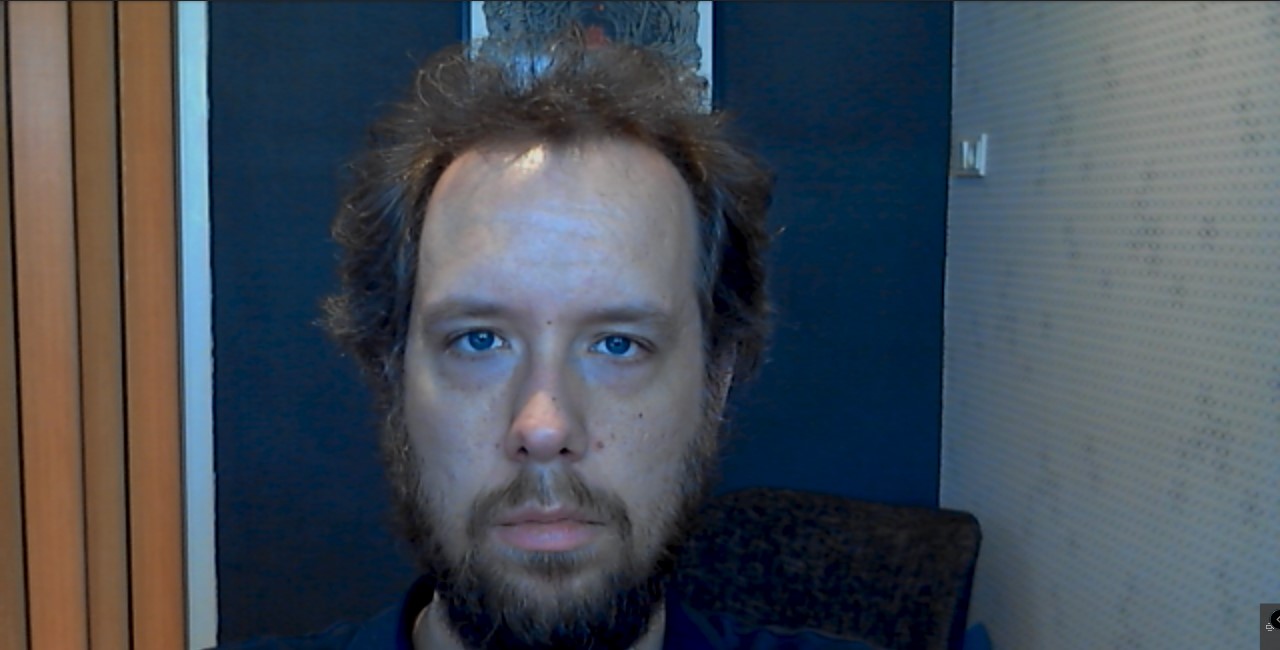
The specs aren’t very impressive either: 60 degress Field of View, max resolution of 720p/30, mono microphone and fixed focus camera. But what can you realistically expect from a €20 expense back in 2011?
One of my colleagues said you can spend a lot on better audio/video and you don’t gain much yourself: the other folks on the call will have a better image, but you won’t. That’s the same as stating we can go to the office in a jogging suit as wearing nice clothes is just for other people. No, I would say there’s a certain line below which it’s not professional anymore. This goes for clothing and audio/video. Of course the line itself is not an exact science but rather culturally and personally determined. But hey, you like a fancy suit, I like a fancy video stream.
The search for a better webcam
Initially I bought some lights as every tutorial you can find says lighting is the most important thing when you want to look good on camera. This apparently has a lower limit as my color improved but was still bottlenecked by the potato ancient webcam.
So the quest for a better spec’ed webcam…at least HD, but preferably 4K would be ideal. One of the better ones was the Logitech Brio 4K. But this is what happened to webcam prices following the pandemic:
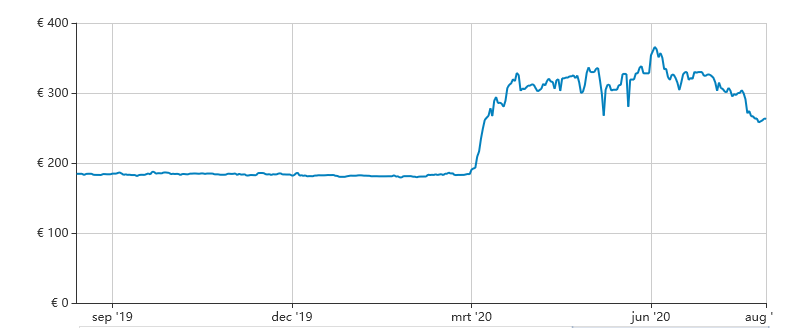
Ok. This is more a matter of principle over price but I wasn’t going to shell out €300 for a 4K webcam when you can get a smartphone for less with a better camera. Moreover, you can put it in your pocket, it has it’s own CPU and can do 9001 other things beside video conferencing. I like quality, and I rather spend more (within limits) and get a better bang for the buck.
Definitive kit list
So what did I end up with? A mirrorless camera with a wide angle lens. It’s difficult to justify the total kit cost by comparing it with a webcam. But now I have a glorious setup that I can take on vacation and I may even start recording some videos.
Which one did I get? Well, the main requirements are clean video out (no focussing/setting artifacts), no limits on video length, and no overheating and shut down when on for extended durations. Especially this last one is hard to check from specifications, so after much deliberation I decided to trust the resources about it online. This led me to the following kit list:
- camera - Sony a6400. 4k/30fps or 1080p/60fps, 24 megapixels, lightning fast auto-focus, face and eye recognition
- lens - Sigma Contemporary 16mm/f1.4 DC DN. 83 degrees FoV, superior low-light performance, and bokeh
- capture card - Elgato Cam Link 4k. Turns HDMI feed into a virtual USB camera
- dummy battery - Andoer NP-FW50. Feeds the camera from AC (instead of real battery). This one is readily available in EMEA.
- micro HDMI-HDMI cable. For connecting the camera with the Cam Link. Could work with any cable, but I took a HDMI 2.0 rated one, as officially the 4k/60fps signal is not supported over HDMI 1.4
- memory card - not sure the camera works without even when not recording. I took a cheap SanDisk one, but take care it’s class 10 or better.
Audio
Now I already have a good USB microphone, so I use that. This could lead to audio/video synchronisation issues. Ideally you have an analog microphone and feed this to the audio in on the camera. That way you don’t need any correction and it’s all plug and play. Alternatively, you can correct the sync delay with OBS Studio (loads of tutorials on YouTube), or accept the delay if it’s not too large.
Mounting
Finally, I mounted the camera above and behind the main screen. I used this YouTube video as inspiration, but none of the components were readily available in EMEA, so I went with this:
- NewStar FPMA-D550BLACK desk mount (meant for flat screen VESA mounting displays)
- Falcon Eyes PH-3 ball head (for mounting and tilting the camera)
- a 3/8" camera plate screw
It’s best to watch the video, but what you have to do is basically: mount the desk stand to the desk, remove the VESA plate from the monitor arm, mount the ballhead to the arm using the 3/8" camera plate screw. To complete the last step you may have to do some minimal DIY: the hole was 9.25mm in my case and I needed 10mm, so I had to widen the hole a bit with a metal drill. The final fixture looks like this:
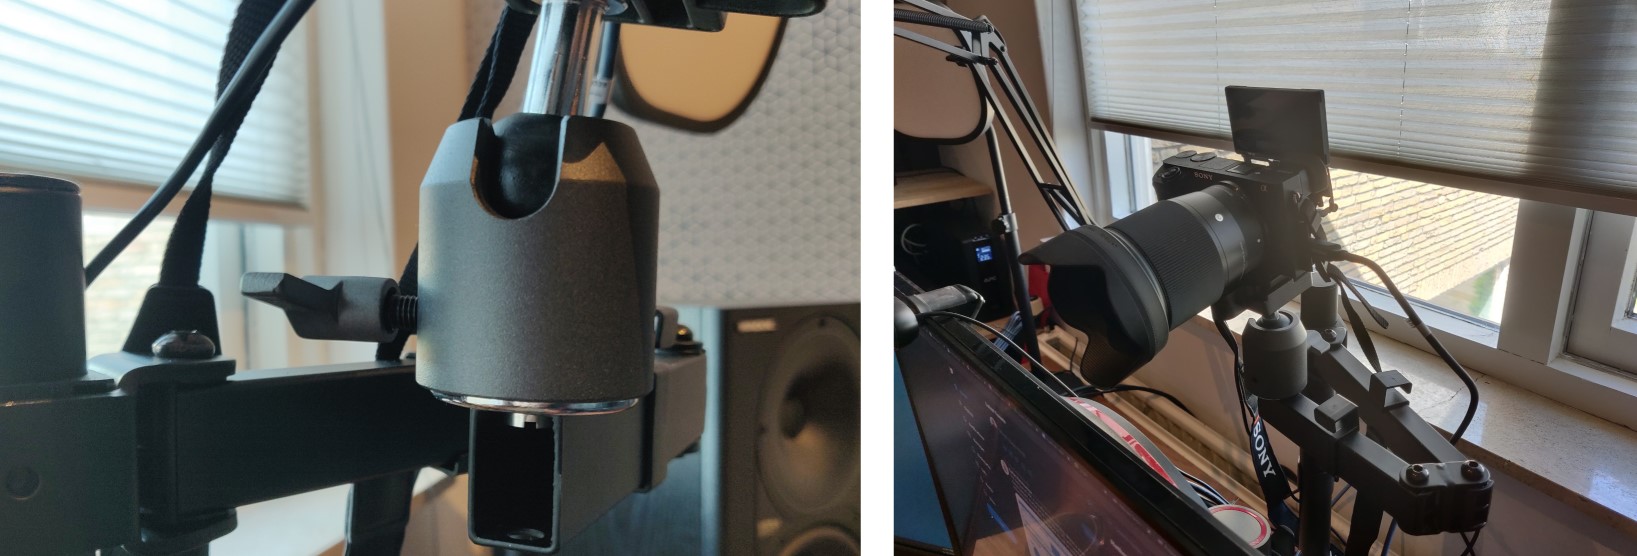
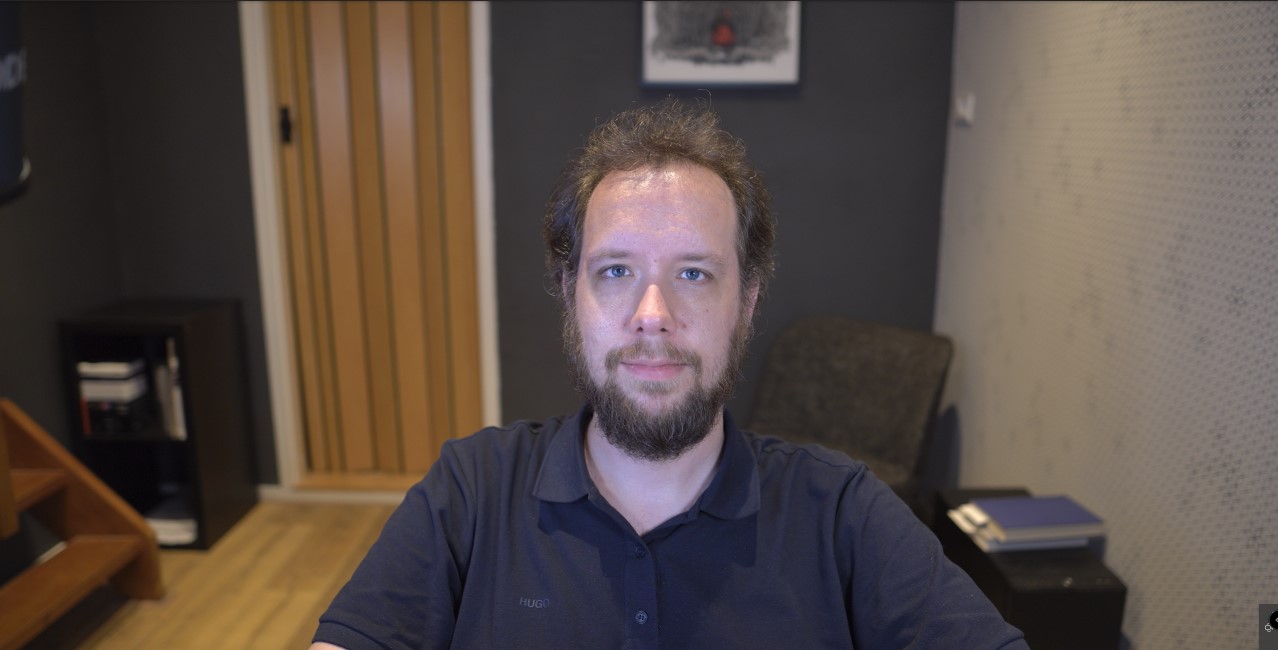
And the result in glorious 4K. Like another colleague said, you can improve the camera quality, but can’t improve the object. Aren’t they a great bunch :)